Installing WordPress on Windows 11 can seem intimidating for those who are new to web development or hosting their own website.
However, with the right tools and a bit of guidance, the process can be straightforward and easy to follow.
Whether you are looking to set up a personal blog or a professional website, this guide will help you to:
- Set up a site without hosting on your computer.
- Malware scanning of your downloaded plugins and themes
- Learn WordPress, although you don’t have resources for a hosting plan
- Test different features without breaking the production environment by bringing your site to the staging area.
This guide will provide you with a simple, step-by-step process for setting up WordPress on a Windows 11 device. Each step is accompanied by screenshots to assist you in the installation process.
Getting to Know WordPress: An Introduction for Beginners
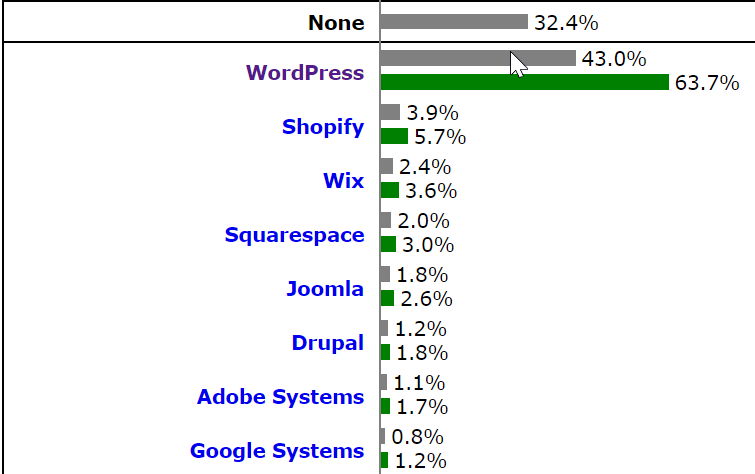
WordPress is an open-source Content Management System that allows you to build and manage websites and blogs. Since its release in 2003, it has become a global leader in content management systems (CMS), powering 43.2% of all websites created with a CMS.
Source: https://w3techs.com/technologies/overview/content_management
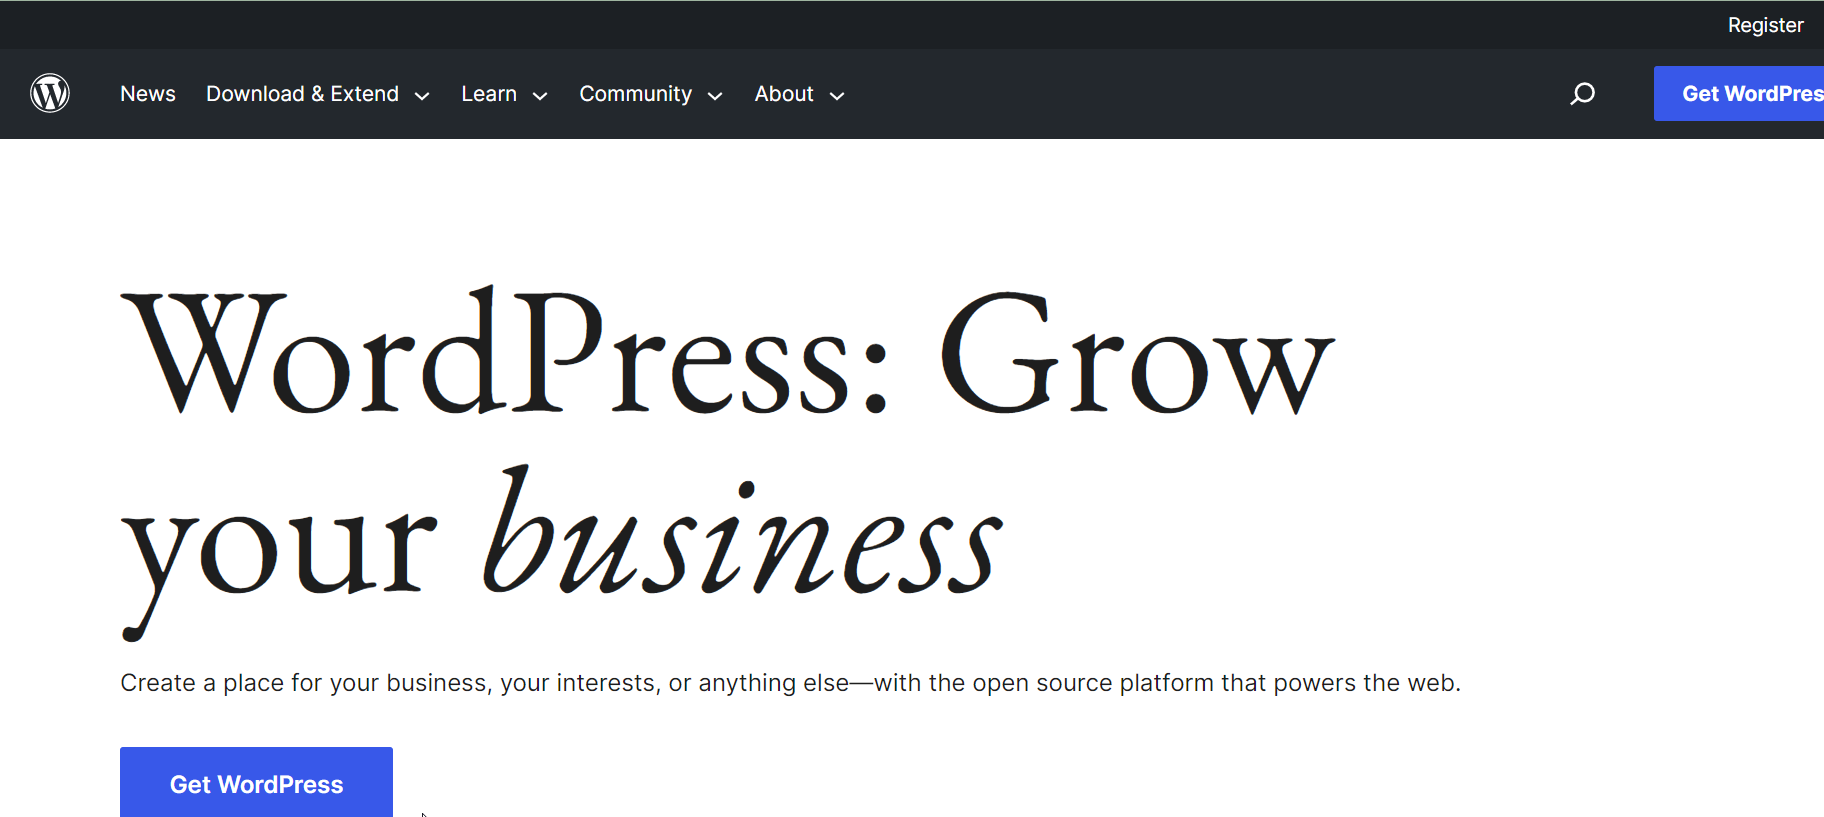
Based on PHP and MySQL, WordPress has a GPLv2 license, so anyone can install, modify, and share it. Contrary to popular belief, WordPress is a robust and well-developed platform, despite being free to use.
I am also using one of the many WordPress themes available to customize the design of my website. In the dashboard, you can also change your WordPress theme at any time.
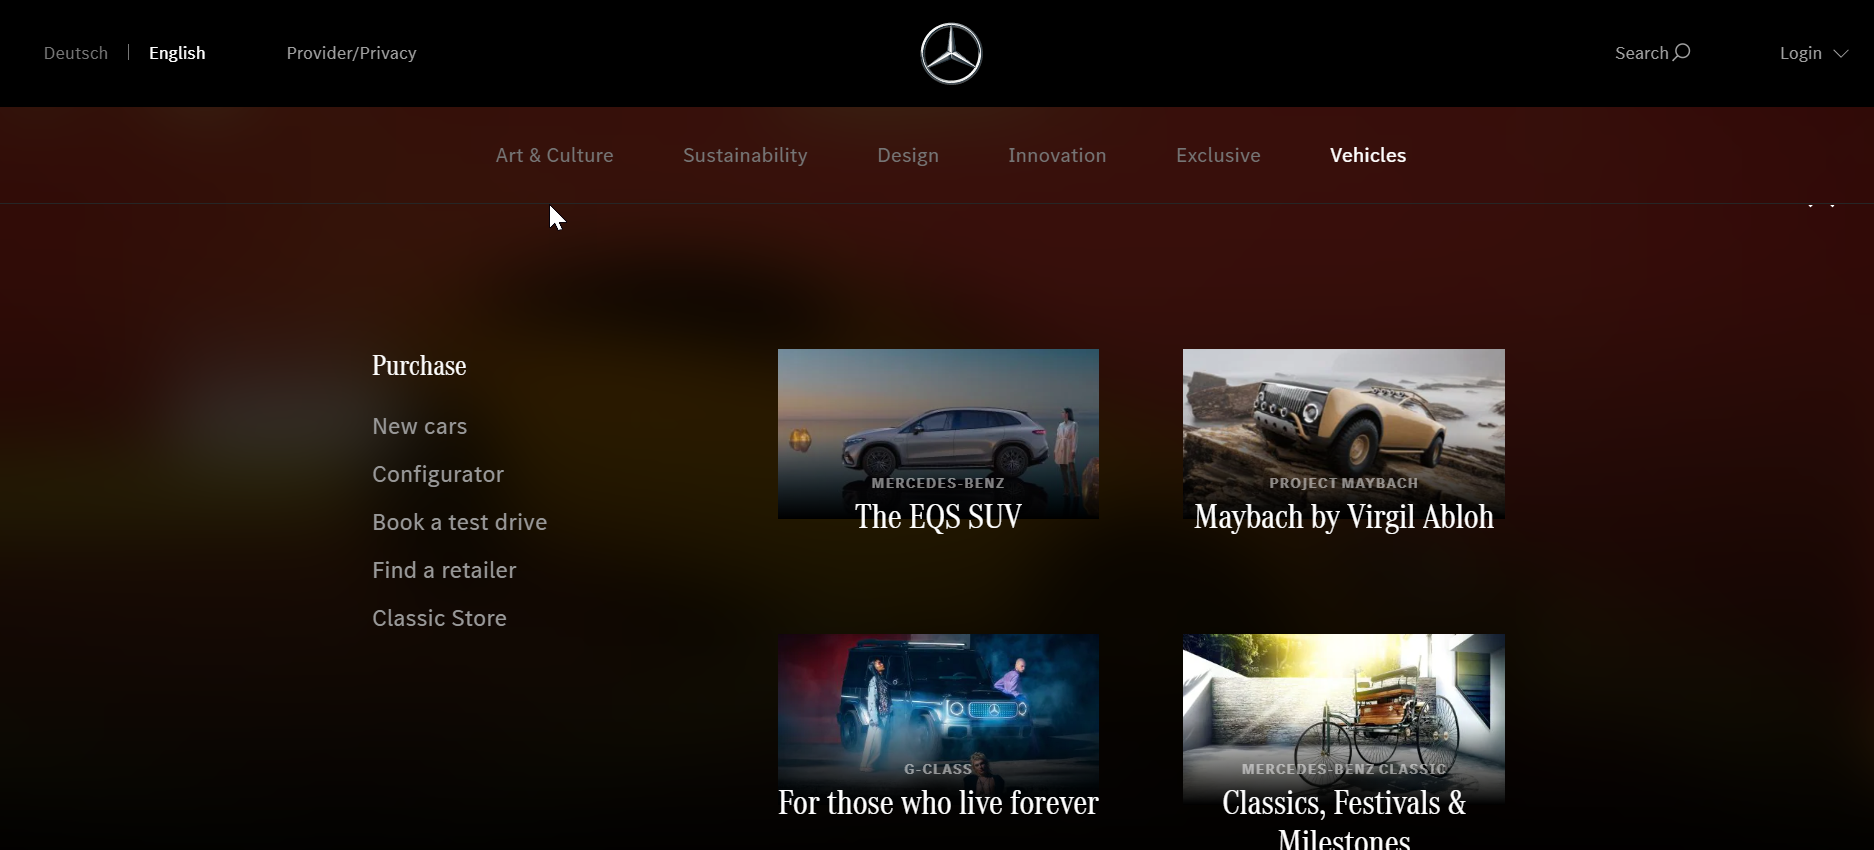
Many well-known internet brands manage their sites with WordPress. For instance, Mercedes Benz, a multi-billion dollar company, relies on WordPress to manage their website.
Even the largest and most successful companies trust the platform, demonstrating its versatility and reliability.
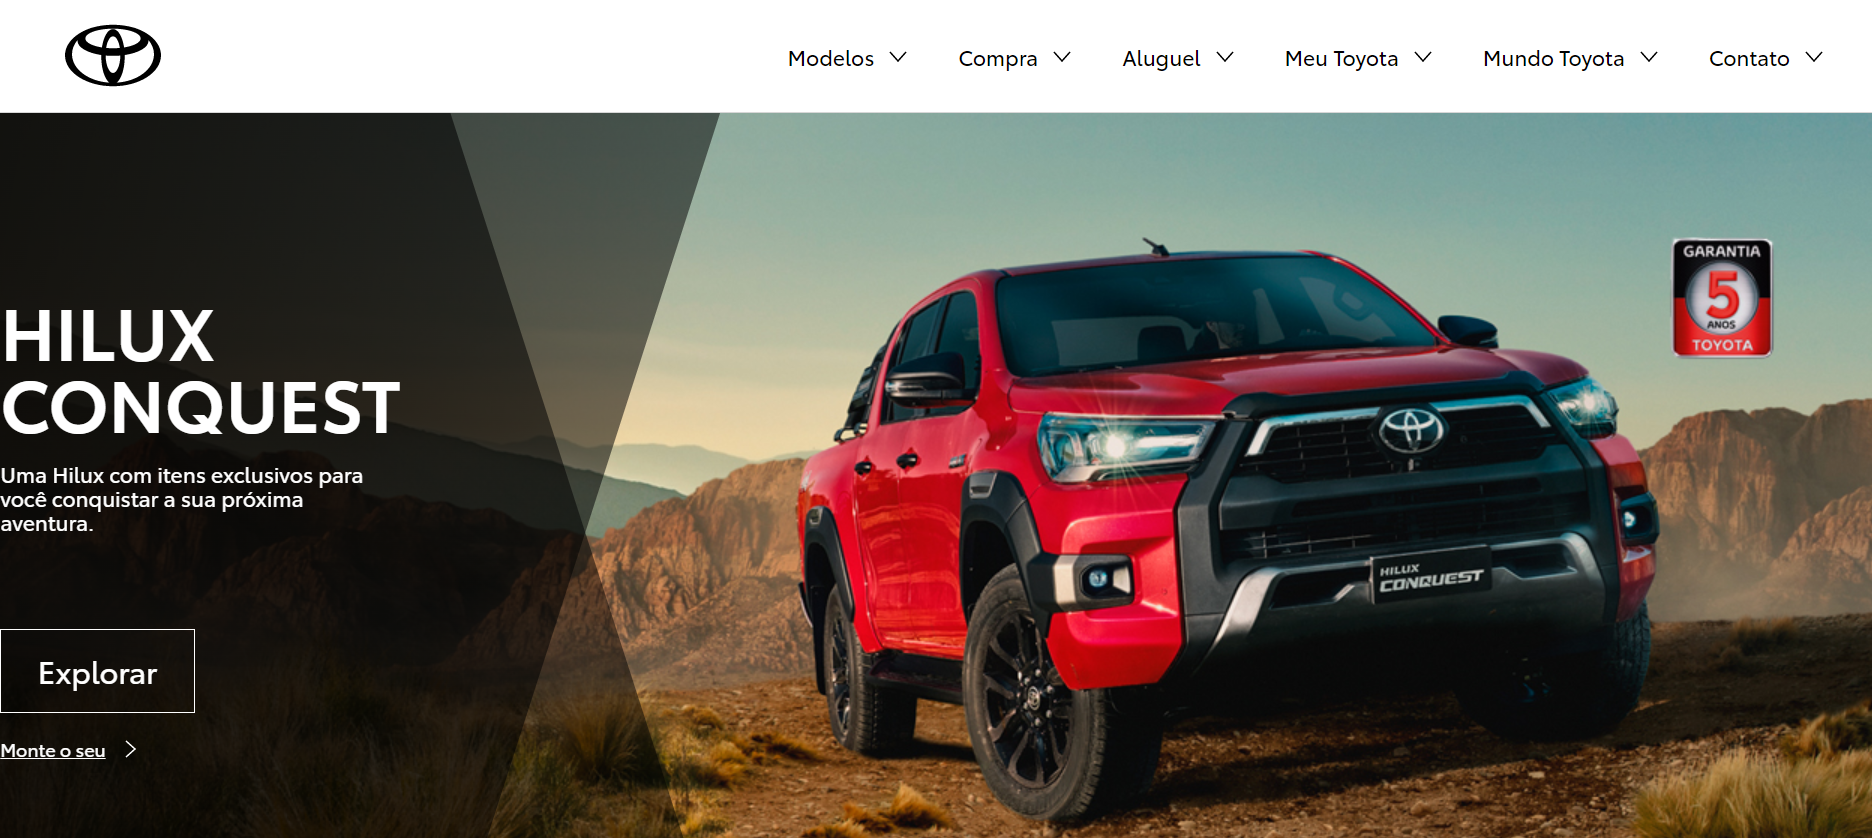
Another multi-billion dollar company, Toyota Brazil, relies on the capabilities of WordPress to manage its website.
Moreover, Fortune 500 companies like Best Buy make use of WordPress to run their websites. This demonstrates the versatility and reliability of the WordPress platform, as it can accommodate the needs of a large and successful company.
The WordPress platform can be used to create highly functional eCommerce sites, as evidenced by the earlier examples. So, you can run a powerful e-Commerce website without buying high-priced software.
You just need to use eCommerce themes. They can be installed on Windows 11 as well.
There is often confusion among beginners about the difference between WordPress.com and WordPress.org.
To put it simply, WordPress.org is a fully open-source system that is free for anyone to modify, distribute, and use. It gives you the flexibility to use it in a way that best meets your needs and preferences.
Contrary to this, WordPress.com offers fewer customization options and less control over the platform than WordPress.org. It is not self-hosted and does not allow full access to the WordPress source code.
It is strongly recommended to choose WordPress.org over WordPress.com, as it offers complete flexibility and control.
With WordPress.org, you can host the platform on your own system, allowing you to access and modify your website no matter what happens to your hosting company. This makes WordPress.org a more reliable and secure option for building and managing a website.
What Makes XAMPP Unsuitable as a Server
Here are some reasons why XAMPP is not a suitable server option.
- Complex installation process: XAMPP can be a bit complicated to install and set up, especially for those new to web development. It requires some technical knowledge and may require troubleshooting if there are issues during the installation process.
- Compatibility issues: It may not be compatible with certain software or operating systems, which can cause problems when trying to run it on certain devices.
- Security vulnerabilities: It is designed for local development purposes but may not be as secure as other hosting options. If the platform is not properly configured, it can be vulnerable to security attacks.
- Limited scalability: This server is primarily designed for local development and testing, so it may not be suitable for larger, more complex websites that require more robust hosting options.
- Lack of support: As an open-source platform, XAMPP does not have a dedicated support team to help users with issues or troubleshooting. Users must rely on the community forum for assistance.
Steps to Install WordPress on Windows 11
Whether you’re a beginner or an experienced developer, this guide will walk you through every step, from downloading and installing WordPress to setting up your first site. So let’s start and bring your website ideas to life with WordPress on Windows 11.
Step 1 – Get LocalWP from Official Website
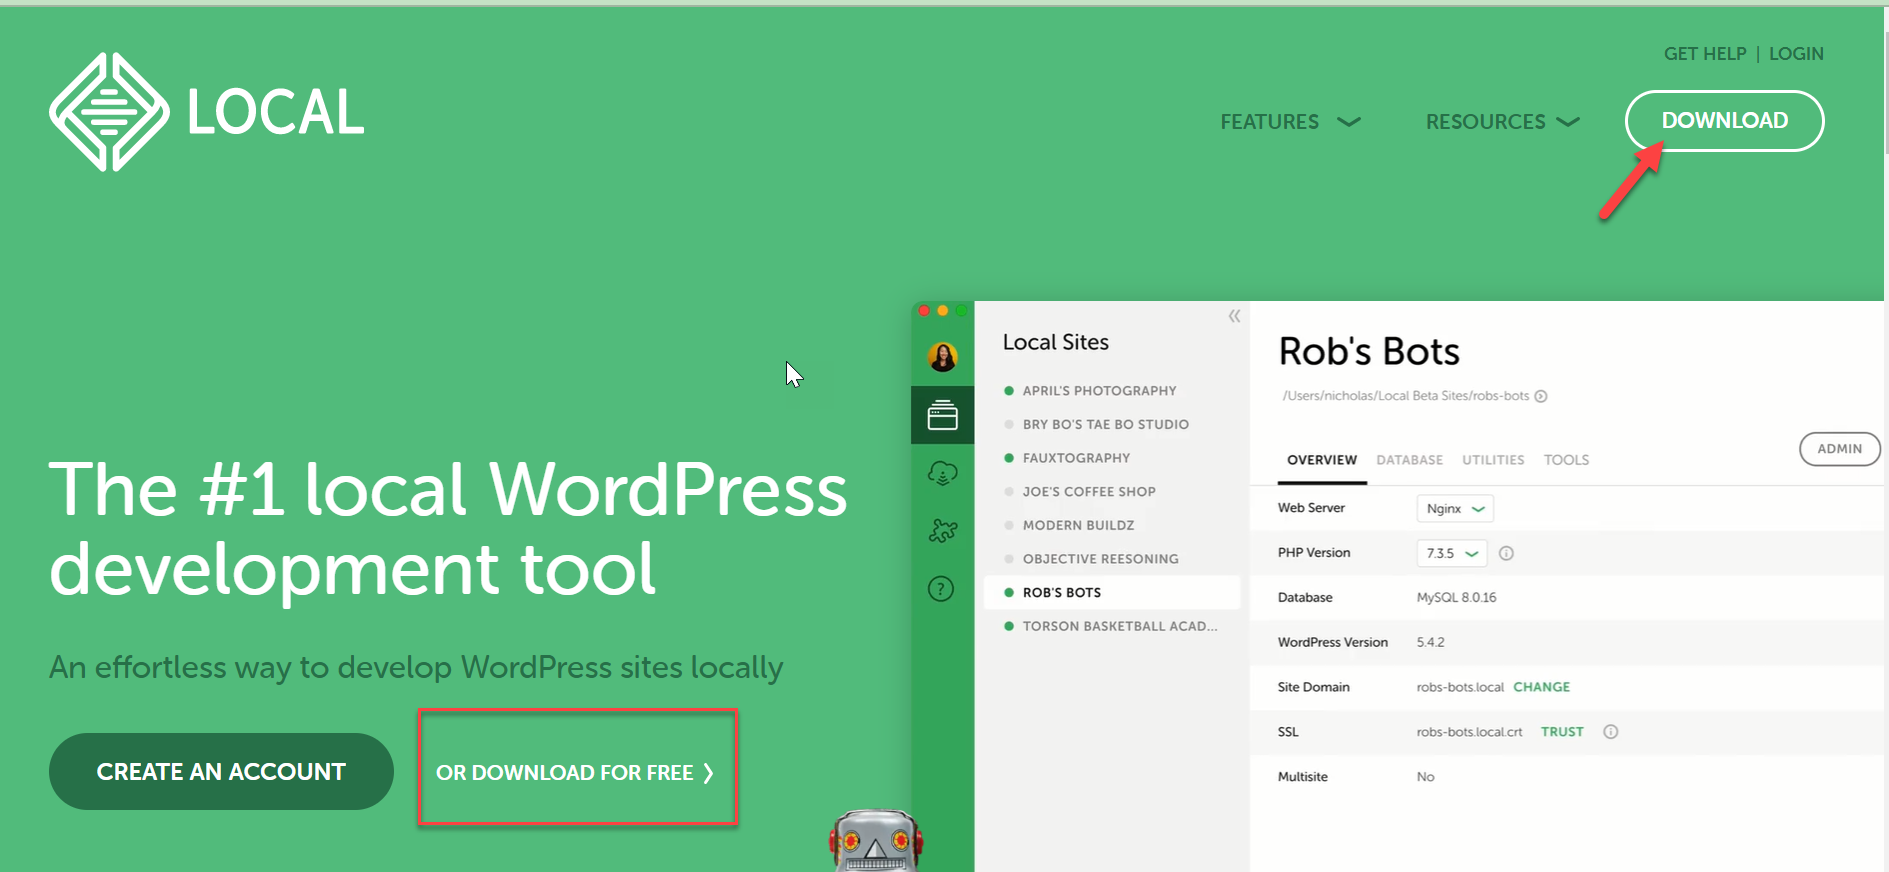
For the latest version of LocalWP, visit the website and follow the prompts to download the latest version. Make sure to choose the version compatible with your operating system and device.
One of the great things about LocalWP is that it is available for multiple operating systems, including Mac, Windows, and Linux. Regardless of your device, you can easily install and use LocalWP to set up a local WordPress development environment.
This flexibility makes LocalWP a convenient and powerful tool for developers and website owners who want to work on their projects locally before publishing them online.
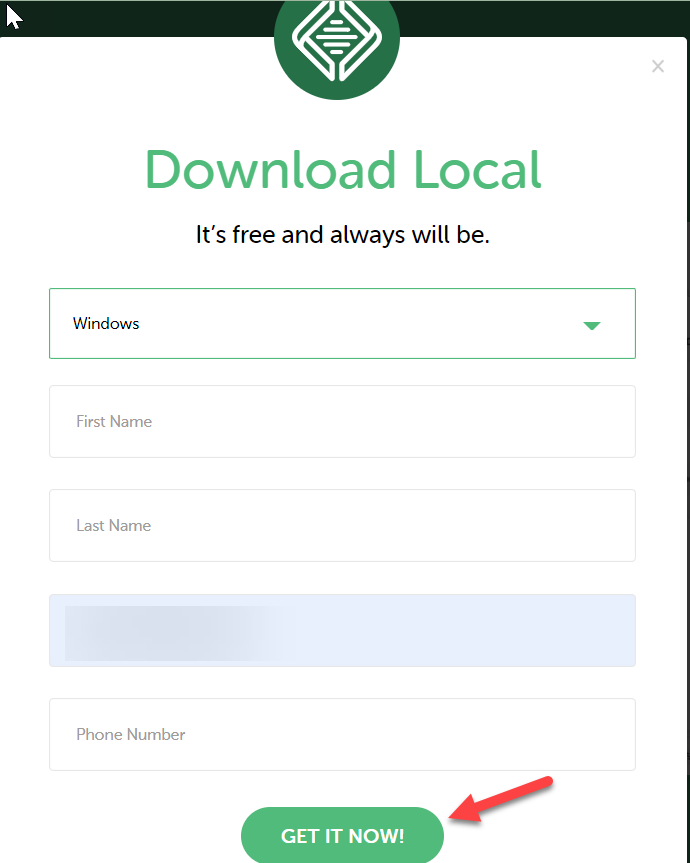
Here, you will have to provide your credentials. Be sure to use your official email; otherwise, your download will not get started. Once you are done, click the “GET IT NOW” button to begin the download.
Step 2 – Running the Installation Wizard
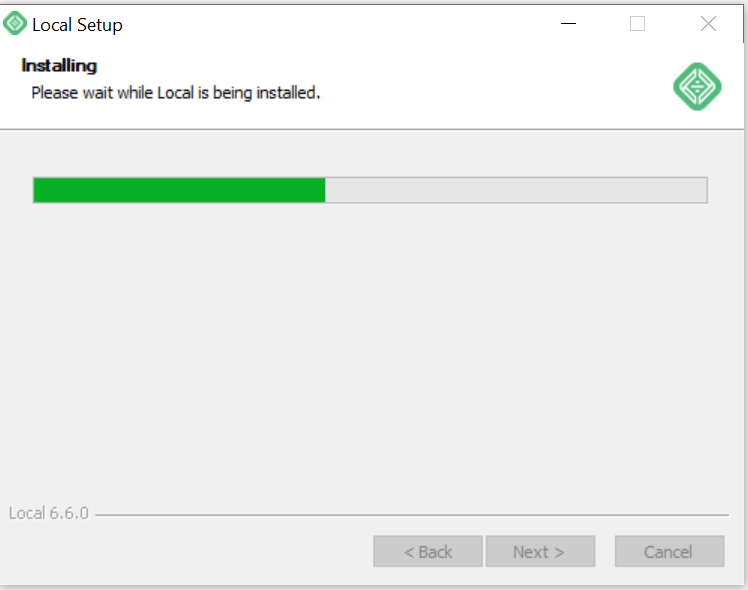
To install LocalWP, follow the installation wizard prompts and choose the software’s destination folder. Follow the instructions carefully and configure the necessary settings to ensure a smooth and successful installation.
Step 3 – Create Your First Website
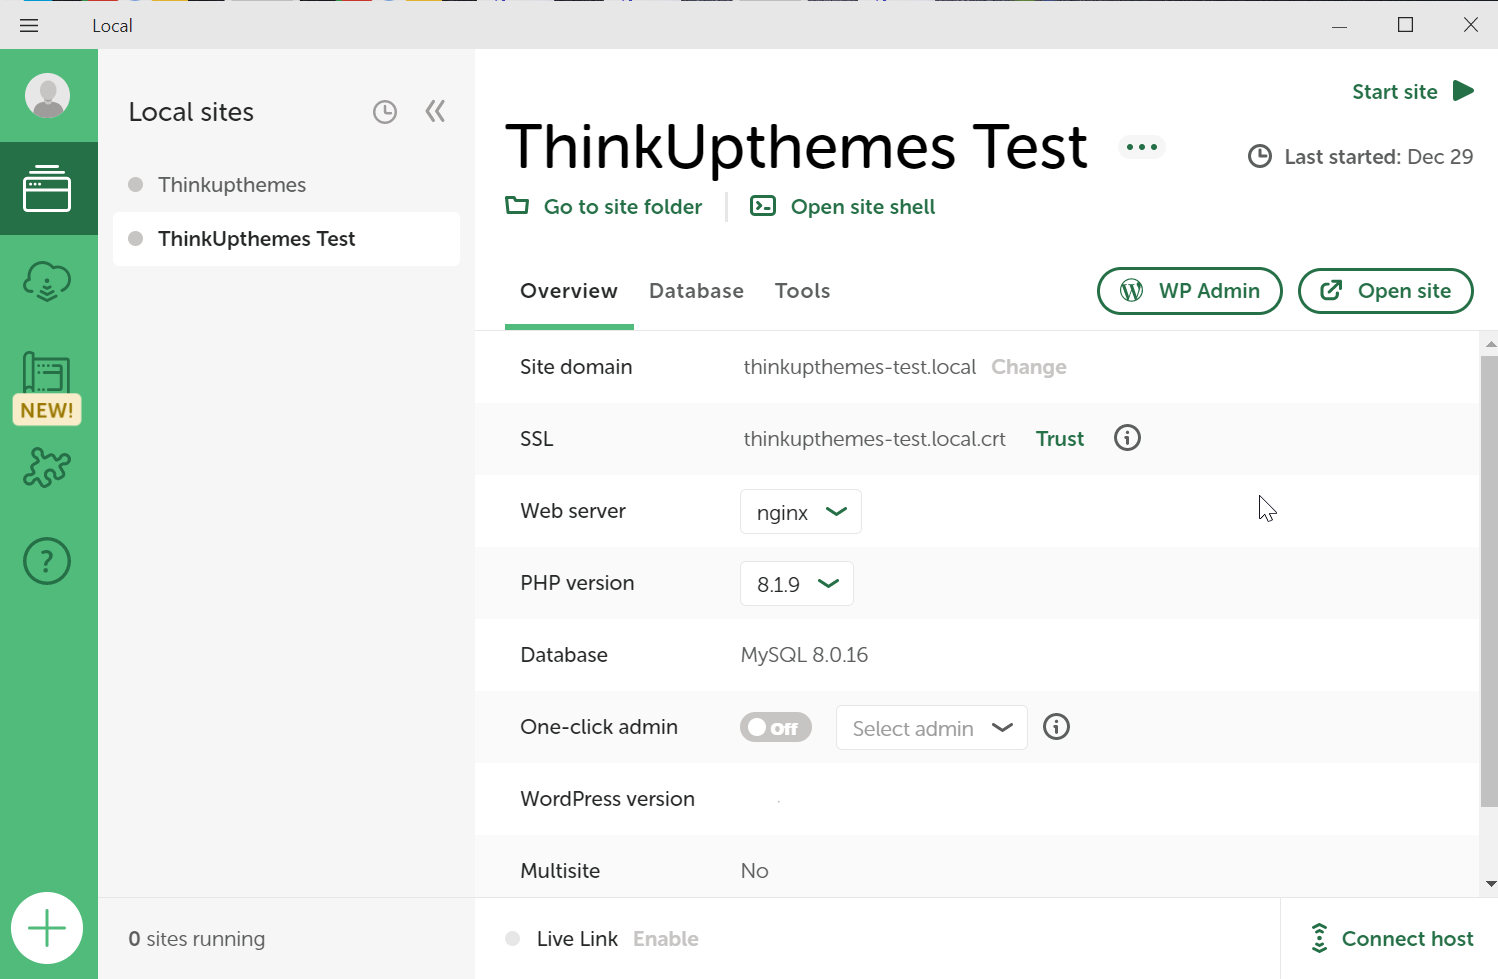
After the installation, you can launch LocalWP and begin setting up your local WordPress development environment.
To create your first website using LocalWP, follow these steps:
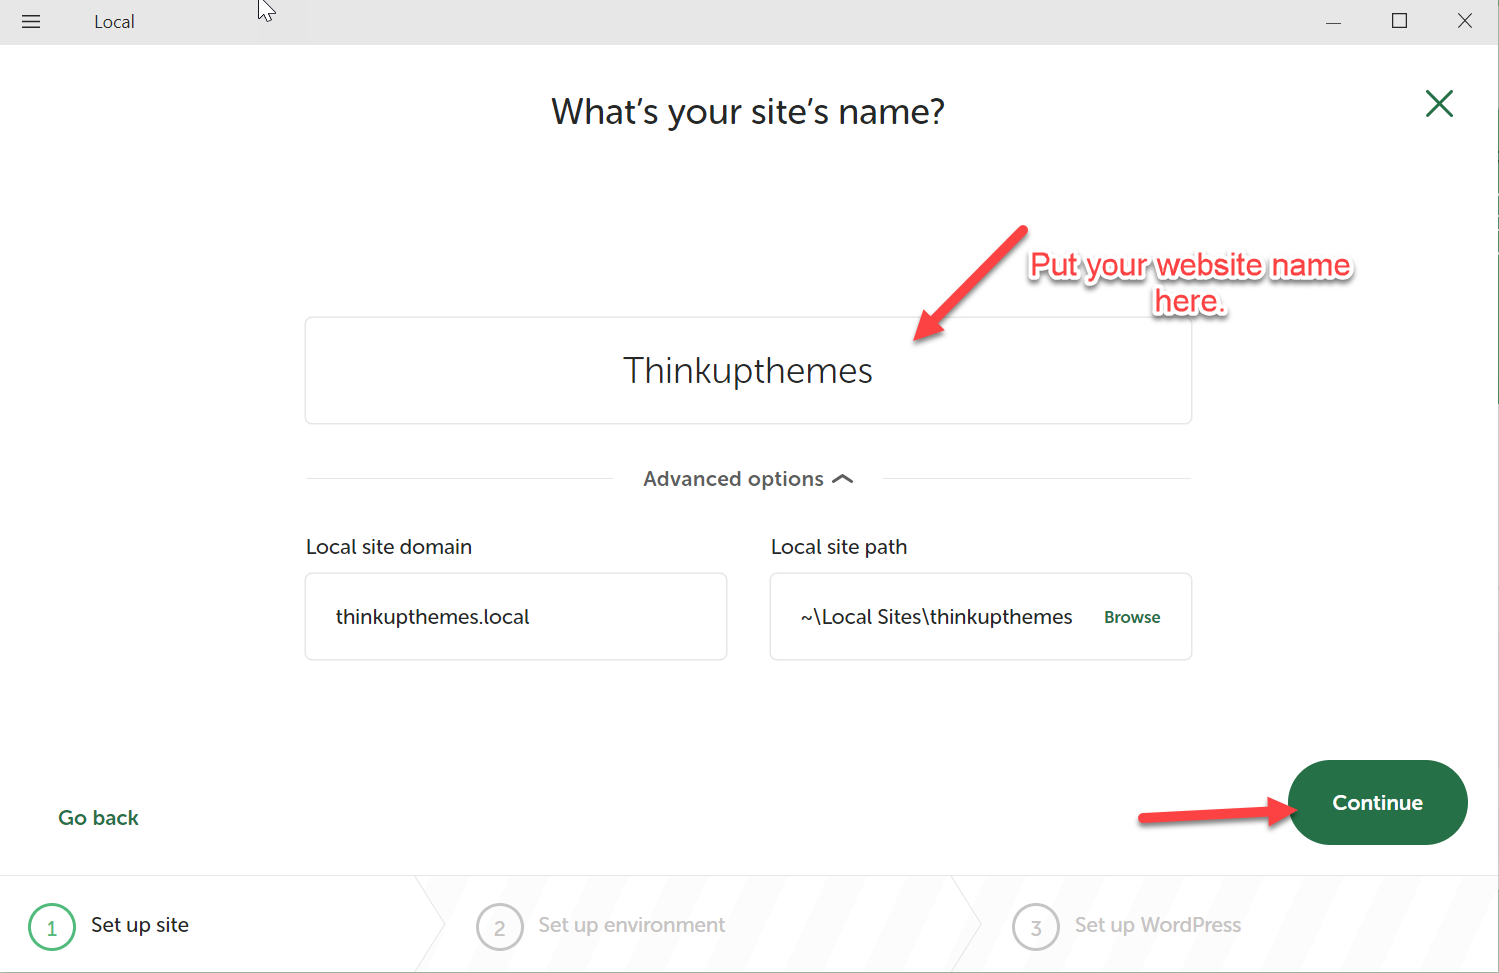
- When you have installed multiple WordPress websites, site names can be helpful to distinguish between them to easily manage and organize your projects.
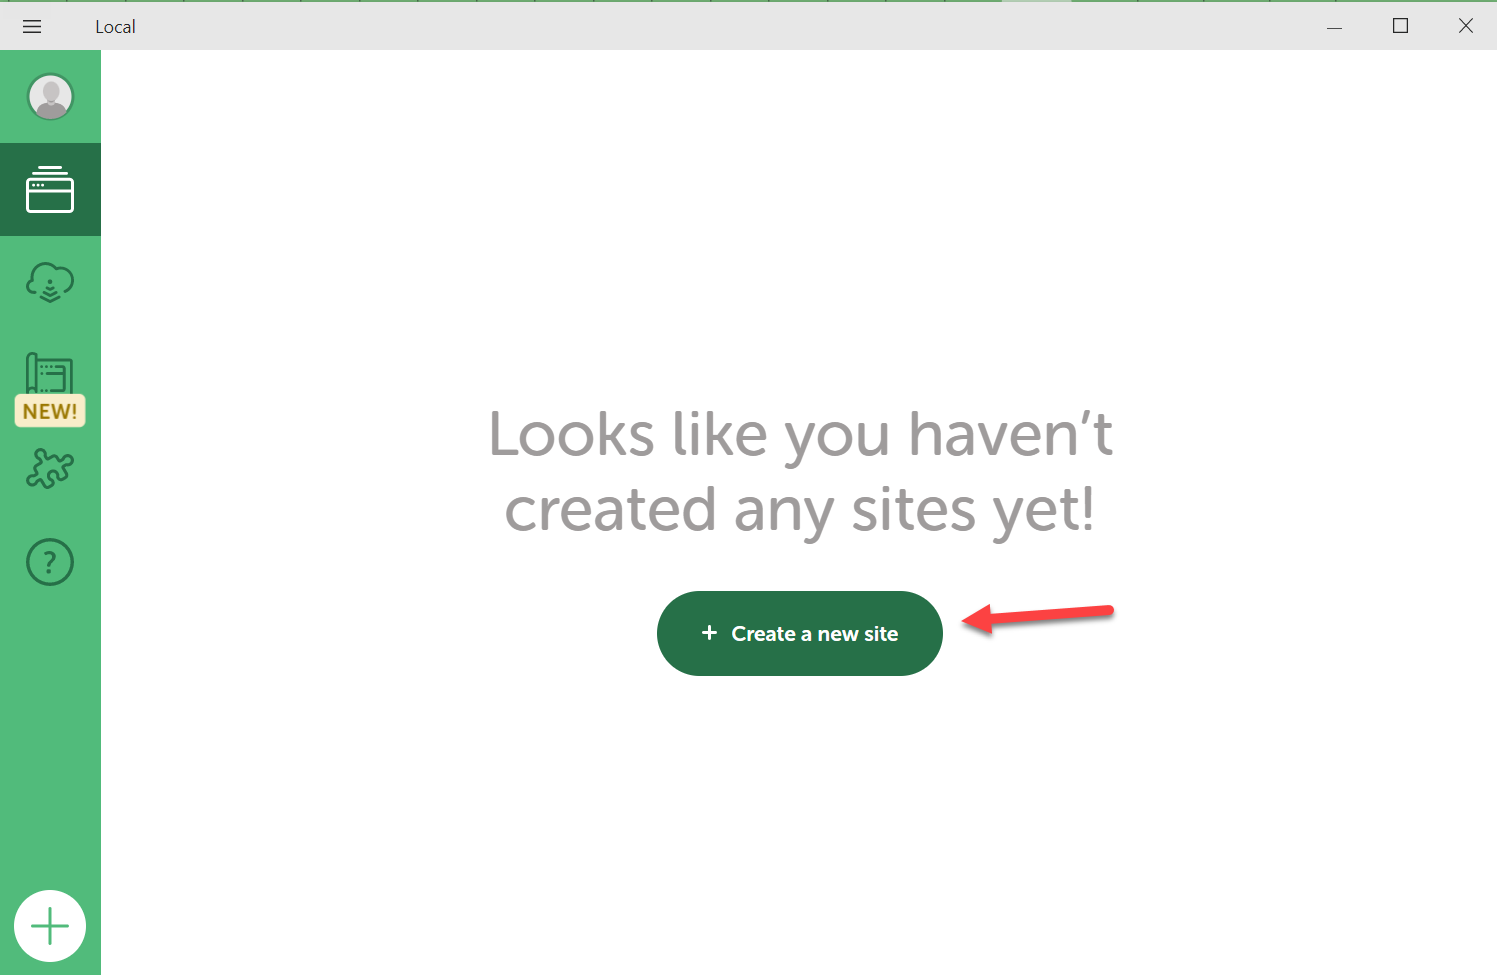
- Launch LocalWP and hit on the “Create new site” button.
- Enter the site name. It automatically fills the “Local site domain” and “Local site path” options.
- Hit the “Continue” button.
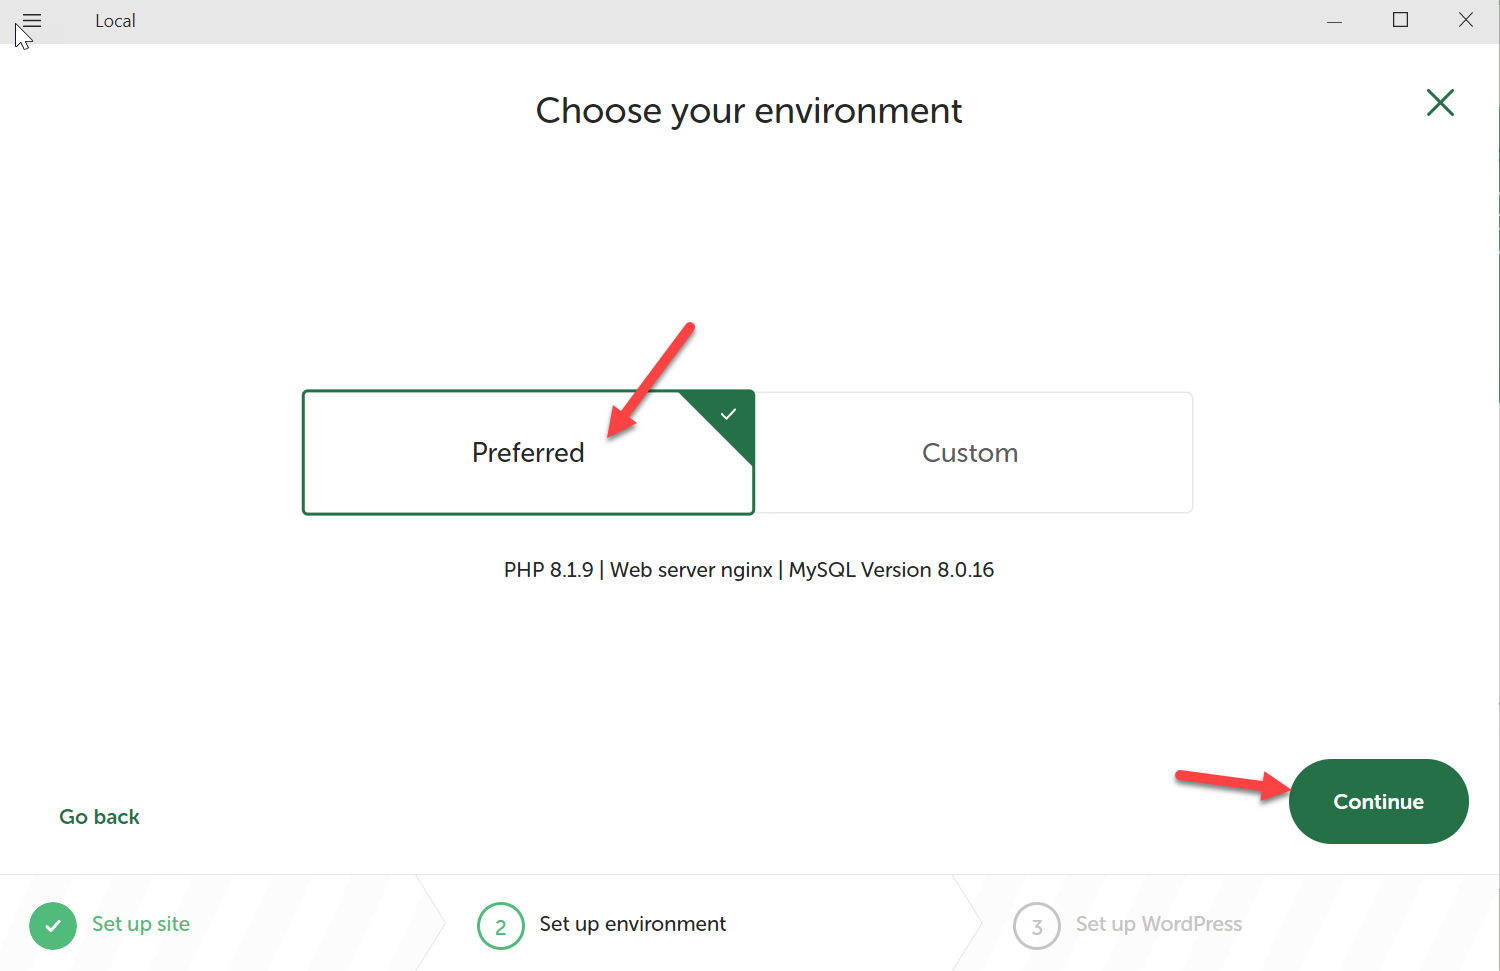
The next crucial step in this tutorial is choosing the server and applications. I recommend selecting the “Preferred” option for configurations, but you can also use Different versions of PHP, MYSQL, Apache, or Nginx web servers.
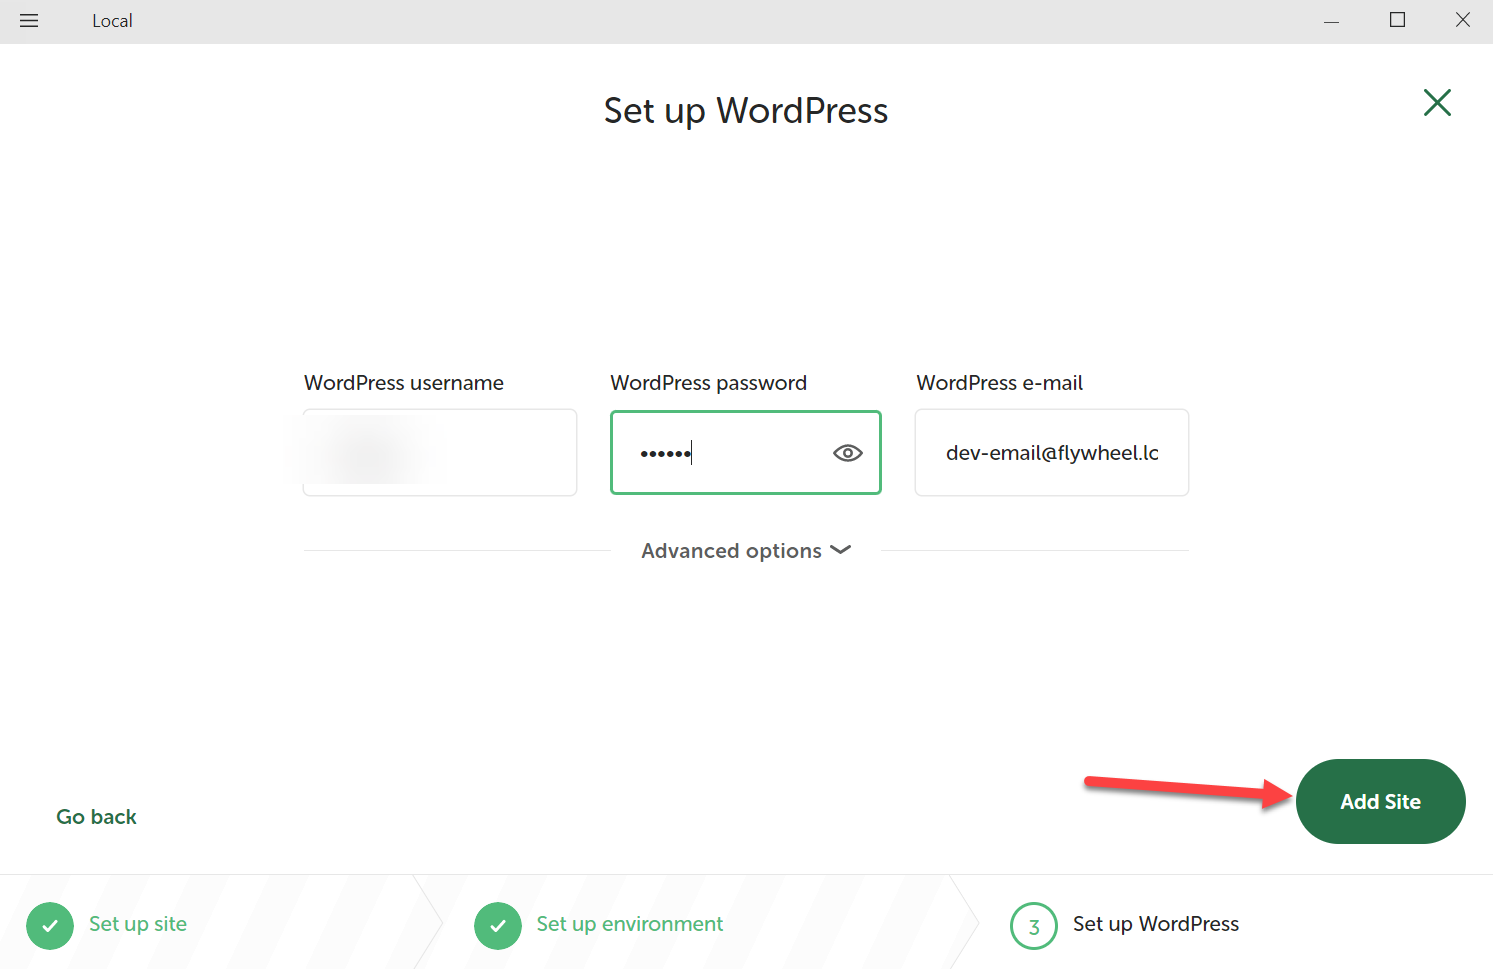
The next screen will ask you to set a “Name” and “Password” for your website. These credentials will be used to log in to the WordPress dashboard, where you can manage and update your site.
Choose a strong and unique password to help protect your site from unauthorized access. After selecting the username and password, click the “Add Site” button.
Installing WordPress and setting up a local development environment takes some time, depending on your computer’s speed and website size. During this time, LocalWP will establish a database for your site and install the latest version.
Congratulations, you have successfully installed WordPress.
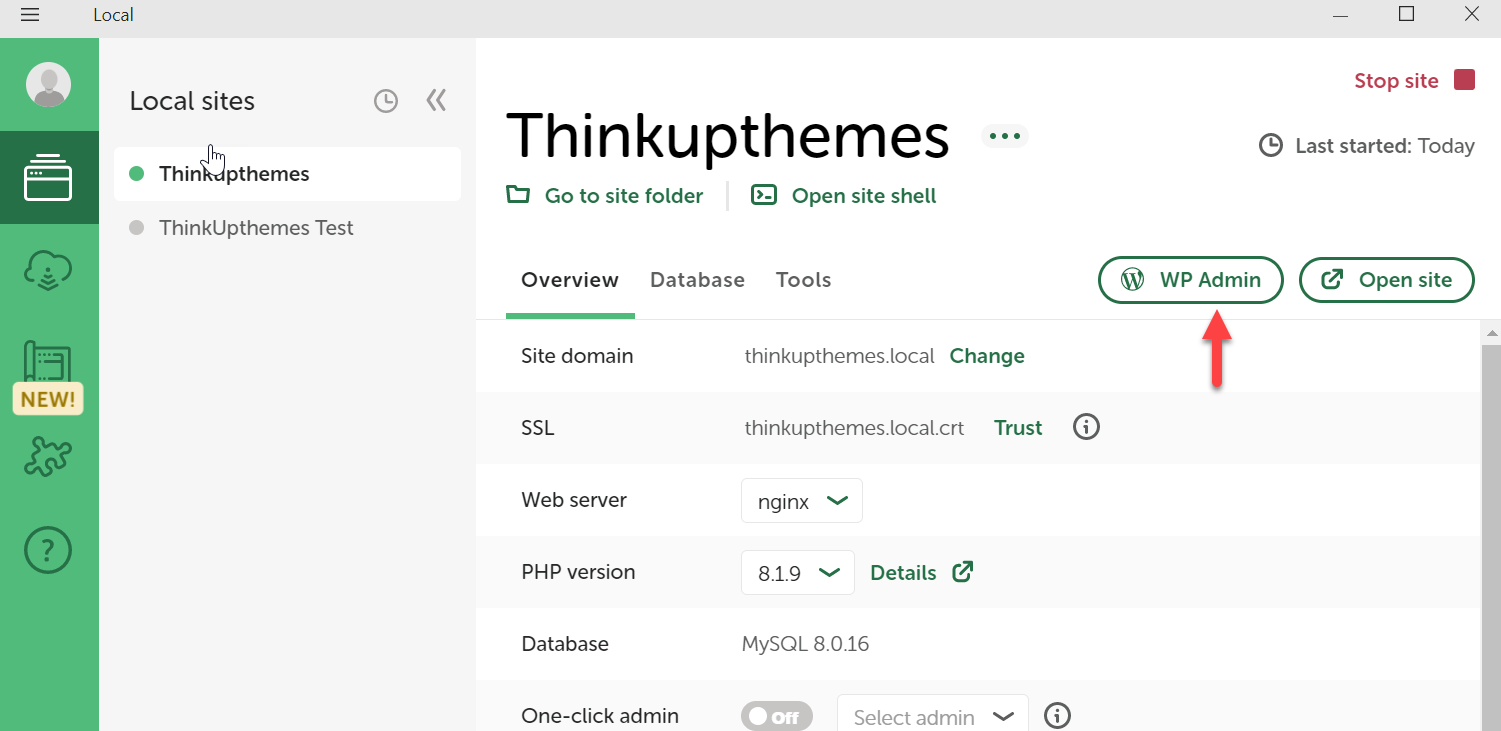
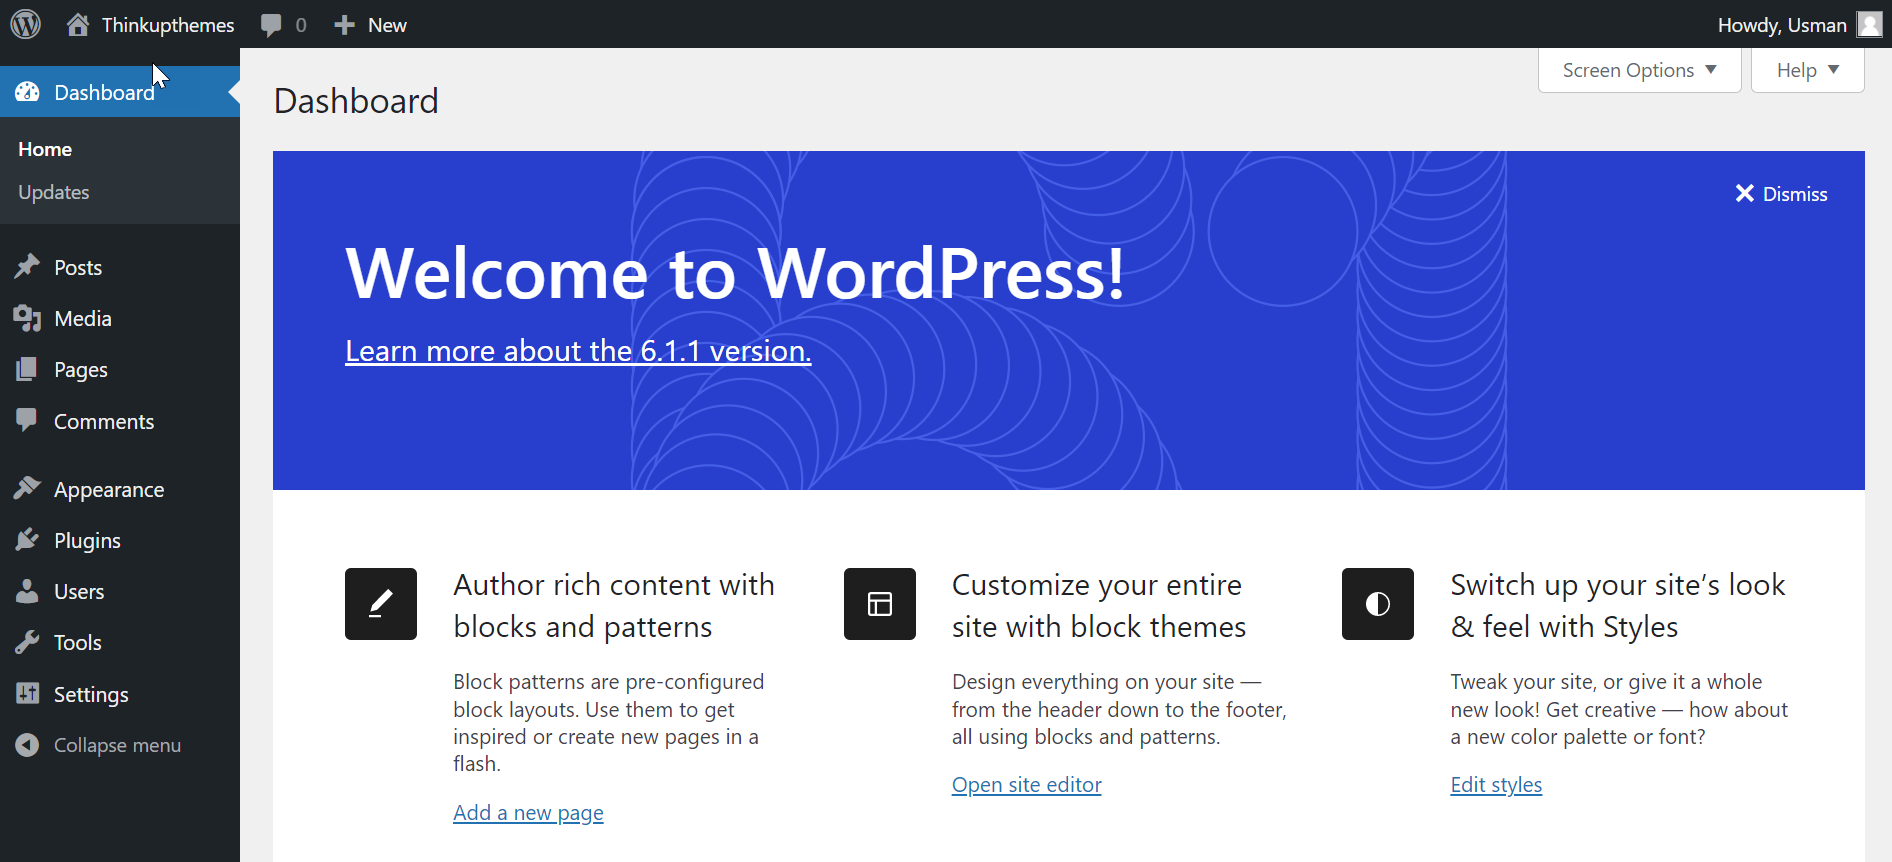
After your site has been created, you can begin customizing and managing it through the WordPress dashboard. You can use the WordPress dashboard to add and manage content, customize the site’s appearance, and install additional plugins.
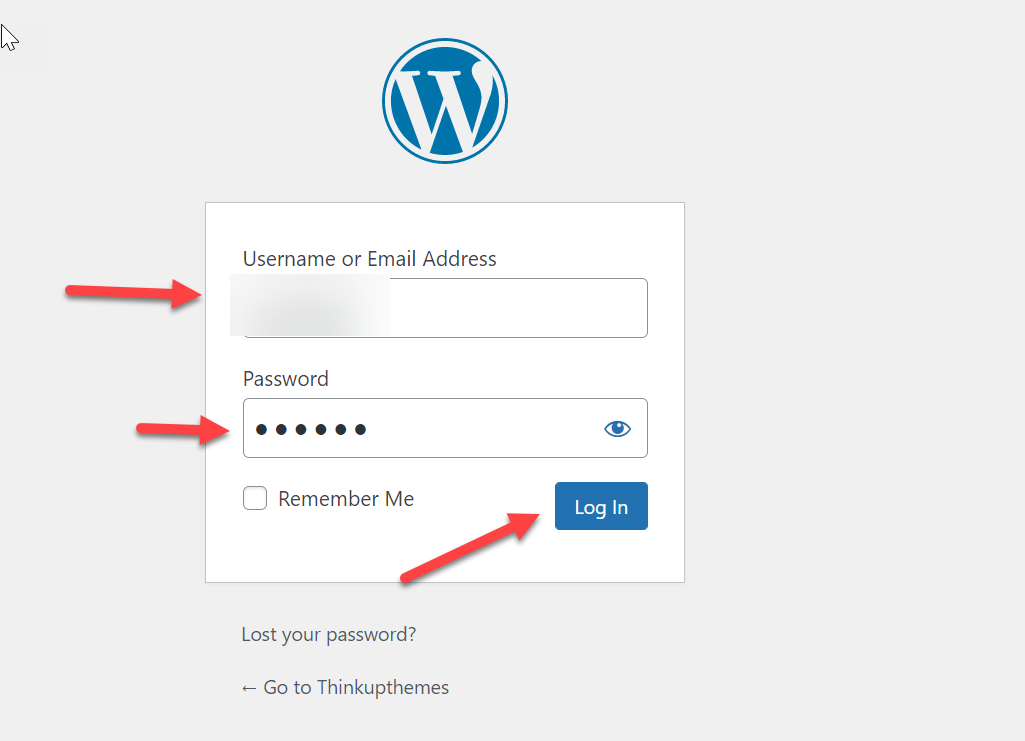
Once you click on the “Admin” button, it will redirect you to a login page where you will be prompted to enter your username and password. These credentials were set during the installation and are used to access the WordPress dashboard.
Simply type in your credentials and click “Log In” to access the dashboard. You can reset your password through the login page if you’ve forgotten your login details.
Your WordPress dashboard is now ready for you to explore and navigate. From here, you can manage and update your site, customize its appearance, add and edit content, and install plugins to add new features and functionality.
Thanks to LocalWP, you no longer have to manually download WordPress or configure a database using phpMyAdmin. Instead, you can input the necessary information, and your website will be live instantly.
This streamlined process makes it easy for you to start with WordPress and focus on building and managing your site rather than worrying about the technical details.
Wrapping Up
Since 2023 is just around the corner, we must use the latest, most efficient, and most responsive technology. One such tool that has proven to be extremely helpful for us is LocalWP.
Whether you’re a beginner or an experienced developer, LocalWP is an excellent choice for setting up a local WordPress development environment.
Its user-friendly interface and powerful features make it easy to build and manage websites, streamlining your workflow and helping you to be more productive.

